If you have been using the full auto mode (aka the little green square) on your camera for very long, chances are that it has frustrated you at some point because it won’t let you do something that seems like a no-brainer. Have you ever tried to turn the off the flash when using full auto only to have it pop right back up when you press the shutter again? Thank the full auto mode for that.
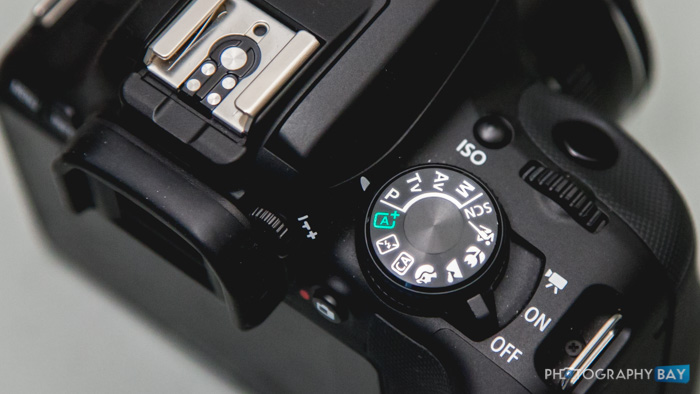
If you are trying to exercise a little more creative control over your camera’s settings, then it is time to move to the P, or Program, mode.
Program Mode vs. Full Auto Mode
As we learned in a prior article, full auto mode locks everything down so that the camera makes all of the decisions, including exposure, flash and focus points, among others. In Program mode, the camera still makes the overall decision of the base exposure based on evaluation of what it meters to balance the light and dark scenes and arrive at 18% gray for the scene.
However, Program mode also gives you control to tweak the exposure by using exposure compensation, flash settings and metering patterns. Additionally, Program mode also gives you control over focus point selections, autofocus modes and other camera settings.
As noted, the basics of exposure are still handled by the camera; however, even those basics can be adjusted to favor one element over the other. For example, in Program mode, you can adjust the ISO setting manually to set an auto-ISO threshold on many cameras. Generally, full auto mode is limited to an auto-ISO setting.
Many cameras also allow you to shift the aperture and shutter speed ranges to a certain threshold in Program mode. This does not go as far as a full-on Aperture Priority or Shutter Priority mode and is generally a limited range when available. Additionally, this is not the same as using exposure compensation. The actual exposure doesn’t change because when you shift the aperture up, the camera shifts the shutter speed down to match the same auto-exposure.
Of course, Program mode also gives you full control over your flash settings. You can turn the flash completely off or select a variety of modes while still relying on the camera to automatically adjust exposure by taking the flash output in account.
Exposure Compensation
Exposure compensation is probably the most powerful feature that Program mode gives you. There is an entire article covering how to use exposure compensation, so I will refrain from re-hashing that. However, the takeaway with exposure compensation is that it allows you to increase or decrease the exposure of a scene. You are essentially telling your camera, “I see what you’re doing there with your ‘balanced’ exposure, but I want it to be brighter (or darker),” as the case may be.
Metering Modes
On most cameras that offer a Program mode, there are generally three or four main metering modes.
- Evaluative metering
- Center-weighted average metering
- Partial spot metering
- Spot metering
The general function of each mode is that they evaluate the scene from the widest area (evaluative metering) to the smallest area (spot metering).
Evaluative metering would be used in a scene where you wanted a balanced exposure for the entire scene (e.g., a mid-day landscape or vacation snapshots). Spot metering allows you to designate a small spot, usually in the center of the frame, from which the camera meters the exposure information. Spot metering is helpful in portraits or other scenes where the subject has significantly different lighting than other parts of the scene.
Changing up metering modes gives you a great deal of control over the camera’s exposure evaluation without actually taking manual control of the aperture, shutter or ISO settings.
Where I Use Program Mode
While I don’t use it very often, I will sometimes use Program mode when I am out with my family – especially if it is a camera or lens with which I am not familiar. I will use a combination of Program mode and exposure compensation for trips to Disney World or other amusement parks. I particularly like Program mode when using an advancing point and shoot camera that has an exposure compensation dial on the camera’s exterior.
I generally favor Aperture-priority mode for snapshots with a DSLR because of a consistent and intentional depth-of-field; however, if I am in and out of various lighting situations, I will use Program mode in combination with an auto-ISO setting to prevent serious overexposure or underexposure, the latter of which induces terrible camera-shake blur. Again, think Disney World and other amusement parks where you are moving inside to outside throughout the day.
Wrapping Up Program Mode
These are some of the major functions and benefits to using P, or Program, mode on cameras that offer the setting. It is a powerful mode even though it still allows the camera to determine the overall exposure. Understanding the control that Program mode offers allows you to create a wide range of exposures and effects in a single scene.


Wonderful article!
What you published made a great deal of sense.
However, think on this, what if you added a little content?
I mean, I don’t want to tell you how to run your website, however suppose you added something to maybe grab a person’s attention? I mean How to Use P
Mode (or Program Mode) on DSLRs & Digital Cameras
is kinda boring. You might look at Yahoo’s front page and see how they create news titles to grab
people to click. You might add a video or a related pic or two to grab people interested about what you’ve written. Just my opinion, it would make your website a little
bit more interesting.
When I make buying, I am often prepared to capture good styles with
my phone. Nowadays I surfed some on-line retailers, and selected 20
exceptional t-shirt designs to share with you.