Not long ago, Angela Datre wrote about concert photography and how to capture the essence of it all. These days, with the usage of the web and the distribution of photos so easily many bands also want videos of their concerts/shows to be shot. As photojournalists are taught, you should be able to use the skills that you’ve honed as a photographer to pull this off very well in addition to using and learning some new tricks of the trade. Here are a couple of tried and true things to remember when shooting performances that have been learned from making mistakes and to continue getting business from the clients.
Note: The following article is tailored to work for bands that perform in bars and venues.
1. Equipment Check
Your gear is truly important to shooting this. Ensure that you have enough space to shoot the entire performance on your HDV tapes or memory cards. Luckily these days, there are DSLRs like the 5D MK II that shoot video. For best results, use a DSLR or camcorder with an external microphone jack. My setup is a Canon HV20, WD-H43 wide-angle adapter, and a Rode Stereo Videomic. The latter has received excellent reviews when used for video with the 5D MK II and should do well with other cameras that shoot video like a Panasonic GH1. Ideally though, since the band will probably want to have the videos go on the web you will want to shoot in 30p as that format does best with the web. Talk to the band beforehand to see exactly what they want.
If you’re shooting still images as well while doing this, make sure that you’ll be able to pull off both well enough to satisfy your clients (the band in this case).
2. Find Out Exactly What the Band is Looking For
Maybe the band doesn’t want certain songs to be recorded because they have videos of those performances already. Perhaps certain members are particular about how they are shot and what they’d really like to see in the video. Another thing could be that they don’t want zooming or switching from one member to another in the video but instead just a steady shot of the entire stage presence. A good idea is to go to their shows beforehand and get a feel for how their dynamics work out and share your own ideas with them.
Think about still photos, but animate them through video. This is a great way to think about shots and angles. This is where using your photography skills will come into play.
3. Talk To the Owner/Manager
Most venues (at least here in New York City) allow people to take photos and videos as long as you don’t interrupt the show for the audience. Either way, it’s a good idea to talk to the manager/owner and let them know your intentions and that the band hired you to work for them. Some venues even allow you to go on stage with the band to get those really great close-ups.
4. Use a Tripod
Don’t make the same mistake I did my first time: use a tripod. There is no way that one can stay there totally and completely still while shooting a performance for 30-45 mins. Additionally, sometimes you may require changing settings. Moving your fingers moves the camcorder and therefore messes with your shot in ways that you may not find major while using the LCD. Plus there is often low lighting at events like these. As often as I say “ditch the tripod” bring the tripod here. Luckily the band, “Irony of Chaos”, continues to use me for their shoots.
Keep in mind if it’s a local venue show, their fans will probably be moving around and you have the possibility of being bumped into.
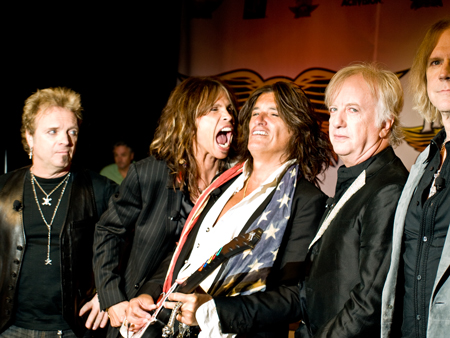
5. Predict Their Movements/Read Their Body Language
As I’ve stated in my wildlife article, predict and read their body language. Sometimes a vocalist will do certain things to allow you to capture it perfectly (in this case, head thrashing). Similarly, a guitarist or bassist may show lots of passion in what they’re doing while performing a solo. The same concept applies for drummers. Read their body language and be sure to pay attention to the stage and what’s being captured as certain members may be trying to make love to the camera.
In this case, you shouldn’t go for crowd interactions as viewers don’t really want to see that. They want to focus on the band members. So try to keep the camera pointed in their direction.
6. In Editing, Mix the Sound Levels to be Perfect
Usually, you should try to get the job done perfectly or close to perfectly in the first place. But we all make mistakes: the important thing about a video like this is the audio. The band will be very picky about the audio. Hopefully, you recorded the performance well and had headphones in your ears to listen to how the audio was coming in. If it wasn’t to your liking then you need to ensure that the audio is excellent because fans of the band will watch the video to listen to the song on top of seeing how they perform. Additionally, think about if the band wants to move onto the next stage in their career: they’ll need great sounding/looking video.
7. Get Rid of Image Noise/Grain
Low light shooting can be a pain with video: it usually requires good lenses to make the most of it and eliminate most of the image noise. Be sure to set the gain levels correctly and try to get rid of any possibly graininess because when you upload the video online the chances are likely that the service will degrade the quality of the video to save bandwidth.
Now you’ve got a lot more options to make a sale to the band. They may want stills for their website or MySpace on top of using the videos for their own YouTube channel.

