In this article, guest blogger and stock photographer, Rich Legg of LeggNet.com, provides his impressions of the first two weeks with the Canon 5D Mark II. You can learn more about Rich and how to connect with him at the end of this article.
I have been living with my 5D Mark II for two weeks now, and while I will leave the detailed reviews to the professional reviewers, I thought I’d share my thoughts so far.
I make my living as a stock photographer shooting exclusively for iStockphoto and Getty Images. In addition, I supplement this income with freelance work. My workhorse camera body for the past couple years has been the original 5D, and it has served me well. When Canon introduced the new 5D Mark II in September, I jumped at the chance to upgrade my production camera to this 21 megapixel beauty. Shooting primarily stock photography, I didn’t need all the features of the 1DS Mark III (focus points, weather sealing, etc.) but I really wanted to up the resolution of my images. The new 5D fit my needs perfectly.
I placed my pre-order the morning of the announcement in September and waited. Thankfully, my local dealer (Pictureline) was one of the first retailers in the US to receive stock. With my early pre-order, I was able to walk out of the store with the camera on the morning of November 25th.

My initial thoughts on holding the camera after un-boxing was that the body felt more rugged than its predecessor. After further inspection, I believe the main reason for this is the combination of the improved rubber gripping and the rougher finish on the magnesium body. In a side-by-side comparison with my original 5D, the older camera is extremely smooth in contrast to the new textured surface of the Mark II. I do wonder though if the smoothness of the original 5D has been enhanced by wear. Otherwise, with the exception of the larger LCD and a couple new or repositioned buttons, the camera handles just like it predecessor.
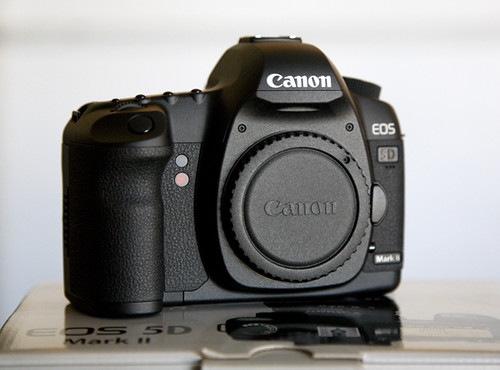
After shooting a quick image to post on my blog showing that I had the Mark II in hand, I charged the battery and began putting the camera through some test shots. I received it on a Tuesday and had an assignment shoot the next day so I wanted to test it out thoroughly before putting it into service on the shoot. I ran through several scenarios at various ISO settings then pulled the card to inspect the images on my production Mac. Everything checked out so I moved my original 5D into the backup position and packed the Mark II for the magazine assignment.

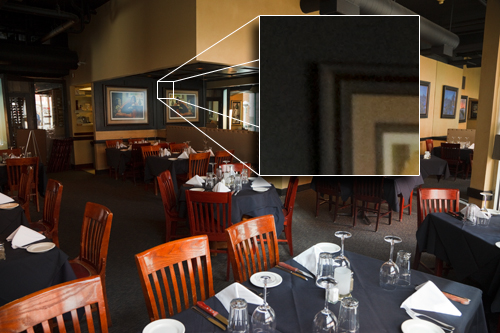
The camera performed flawlessly in the magazine shoot. The assignment called for three images from a high-end steakhouse to accompany an article. The first image was a close-up of a filet mignon on a table, the second was a portrait of the owner/chef and the third was a shot of the dining room. For the first two images I operated no differently than I would have with my original 5D. For the dining room shot though, I was able to put to use the Mark II’s improved image quality at higher ISO’s. I shot the dining room at speeds between ISO 1000 and 1600. This is something I would have never done for a paid assignment before, but the images from the new camera were exceptional at this speed. I would compare them (un-scientifically) to the results I would have received at under ISO 400 on the original 5D. This made me smile.

The next outing for the new camera consisted of an impromptu Photowalking Utah event on Thanksgiving evening in Salt Lake City. I joined up with six fellow photographers for a nighttime stroll around the downtown area. Typically on an outing like this I would have carried a tripod and shot all my night shots with long exposures. Since I was carrying the new Mark II, I loaned out my tripod to another shooter (he forgot his) and opted to go handheld at high ISO settings. Using a 20mm f/2.8 prime for the majority of my shooting, I pushed the ISO to 6400 and went to town.

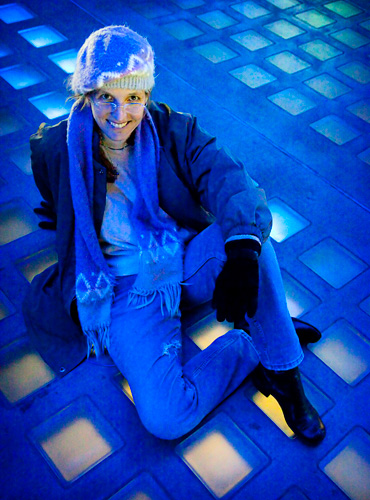
While the resulting image quality at these high ISO settings is not something I could use for stock work, the pictures were definitely usable. I found that I was constantly rolling the ISO between 1600 and 6400 to suit the scene I was photographing. I was so encouraged by the results, I pushed the ISO to 25,600 for a proof-of-concept shot in an area that was nearly too dark to see. As can be seen in the image below, while the shot is in no way perfect it did capture detail and color at this ridiculously high ISO setting.

After shooting high-priced steak and photowalkers, it was finally time to put the camera to use on a studio stock shoot. I had a baby girl coming in for a stock session and this would be the first use of the camera in-studio. Everything handled and functioned for me just as it would have with the original 5D, with a couple of exceptions. The biggest surprise for me of a new feature that I didn’t know I would use is the “Quick Control Screen”. This function mimics all of the settings that are on the top of the camera in the small LCD to the right of the prism, but instead displays them on the spacious color LCD on the back of the camera. I have mapped the “SET” button on my camera to bring up this menu. I find this an extremely useful way to make quick changes to f/stop, aperture, or any of the other shooting functions. In a darkened studio, this came in very useful.

When it came to editing the large 21 megapixel images on my production Mac, I had to make a few adjustments. My workflow consists of shooting images in RAW mode and using Adobe Camera Raw (ACR) to convert them before editing in Photoshop. Since Adobe stopped updating the ACR converter for Photoshop CS3 prior to the release of the Mark II, this necessitated an upgrade to CS4. The image quality from the new camera is fantastic. I find the color representation of the unedited images to be more true on the Mark II compared to my original 5D. The images are a bit cooler, but I always seemed to be cooling down my 5D images with a white balance adjustment anyway. After one session of working with the large images though, I jumped online and ordered a memory upgrade to bring my production iMac from 2gb to 4gb of memory. I found that I was quickly slowing down my system when working on several of the full-resolution images at once.
There have been some rumblings on the internet forums about “Black Dots” appearing next to blown out highlights on the new Mark II. I have seen no indication of this on my camera and have even tried to recreate the problem by purposely overexposing shots of city lights without success. [Ed. – This issue appears to have been diagnosed and somewhat resolved.]
So far I am extremely pleased with the purchase. To think that I upgraded from 12 to 21 megapixels and picked up all the new features for $300 less than I paid for my original 5D is amazing. I guess we should thank the new full-frame competition from Sony and Nikon for this. I look forward to continuing to put this camera through its paces and learning more about what it has to offer my photography.
Rich Legg is a stock photographer for iStockphoto. You can follow him on his blog, LeggNet’s Digital Capture, at leggnet.com or on Twitter at twitter.com/leggnet. His stock portfolio can be seen at RichLegg.com.


Thanks for sharing your experiences.
Sounds like a great camera, and I’m certainly getting me one.
Another solution to the Camera RAW update problem (hence not buying CS4) is converting the RAW files to DNG on import. The DNG files are usable in older Photoshop versions with the same control.
Great practical write up Rich. I am envious of the great camera in your hands. One of these days…
Couldn’t agree more with your findings! While I have only had this camera for 3 day’s I have already been able to push the limits of what I was formerly able to with the 5D. I photographed my son in a concert with no lighting at all and got great shots, next came a photo shoot of 2 girls in a warehouse on a cloudy day (no lights needed) I think the new 5D and I will be best friends.
And what about movie mode in low light:room or cloudy day ? What lenses is essential to make proper movie?