In this article, contributing author and stock photographer, Rich Legg, offers some tips on using the rule of thirds. You can learn more about Rich and how to connect with him at the end of this article.
One of the first things commonly emphasized to novice photographers by those who claim to be more knowledgeable on the subject is to “Follow the Rule of Thirds”. While this is sound advice, the phrase can be confusing especially to someone who has never had it explained to him or her. For me personally, I can still picture my high school photography teacher Mr. Cressop explaining it on the blackboard back in 1981 (wow, that’s a long time ago!).
What is the Rule of Thirds?
Simply put, the Rule of Thirds is just one of many tools photographers can use while composing their image. Here’s how I instruct it to the students I teach: Place four evenly spaced imaginary lines across your image, 2 horizontal and 2 vertical, and use these lines as a guide for arranging the objects in the viewfinder. I have even further simplified it to some (mainly children) by suggesting that the shooter imagine a “tic-tac-toe” board over the photo.
Once you can imagine these lines, place the subject very near a line and, when possible, arrange the main focal point of the subject where two of the lines intersect. In doing so, the visual appeal of the photo will increase dramatically. This is because of how the human mind processes the image and the balance created with this formula will decrease tension and make the photograph more pleasing in the viewer’s mind.
A common mistake that many beginner photographers make is using that nice circle in the center of the viewfinder to point at the main subject of their photo. While this technique might work well for military snipers, it can lead to some pretty awful photo compositions. We can all probably tell stories of our great aunt (or in my case, mother-in-law) showing us the family photos she’s taken where the top-half of the shot is filled with empty headroom.
Tips for Using the Rule of Thirds
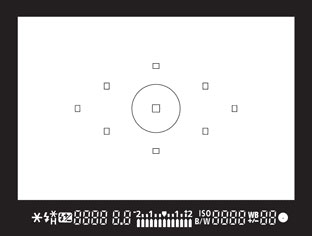
To help photographers overcome this problem, many camera manufacturers have taken to placing third-lines into the viewfinder and/or LCD screen. I know that on the point-and-shoot Canon G7 that I have had in my daily-carry bag for a few years, the LCD has an option to display these convenient aids.
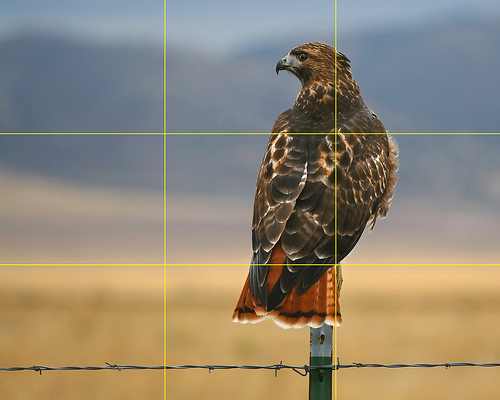
On the sample image above that I am using for this tip, I took one of my favorite bird photos and added yellow rule-of-third lines to illustrate the process. When composing the photo I placed the bird on the right most vertical line. The main focal point of the bird is the eyes and beak, but I found that if I placed them on an intersection point of horizontal and vertical lines the photo was a bit bottom heavy.
Instead, I placed the bird’s body where the two nearest lines meet. Doing so creates a pleasing composition since the bird’s head is close enough to an intersection to take advantage of the rule. Had I taken the same photo and composed it differently by placing the bird in the center of the image, the result would not be as pleasing.
Since I’m on the subject of image composition, the shot of the hawk above demonstrates another “Rule” that can be followed to make a shot more pleasing. In most situations it is desired to have the subject looking toward the center of the image. If the bird were looking to the right rather than the left, the photo would not be as pleasing to the viewer’s eye. In fact, to many people it would just “feel uncomfortable”. The same can be said for motion. If the photo is of a subject in motion, compose it so it is moving toward the image’s center.
It’s More of a Guideline
Finally, remember the old adage “Rules are made to be broken”. There are plenty of times when a more pleasing image composition can be created by breaking the Rule of Thirds rather than following it. Try using this rule as a guideline and see if your work improves. After a while you might even find that you naturally line up your images this way without even consciously thinking about it.
Rich Legg is a stock photographer for iStockphoto. You can follow him on his blog, LeggNet’s Digital Capture, at leggnet.com or on Twitter at twitter.com/leggnet. His stock portfolio can be seen at RichLegg.com.


great article rich! sometimes i like to combine the rule of thirds with the golden mean… i would place the subject by the thirds line and have it fall within the vanishing point of the golden mean spiral… man, im not even making any sense to myself.
A post processing hint: In photoshop, you can setup gridlines to automatically display on the thirds. Go into Edit | Preferences | Guides, Grids & Slices. In the Grid section, set a gridline every 33 percent with 1 subdivision. Then you can use View | Show |Grid to toggle the lines on and off, or use Ctrl-‘.