The following is from HDR Photography | A 3 DVD Comprehensive Guide to HDR Photography by SLR Lounge. We cover bracketed HDR, in-camera HDR, single-shot faux HDR, single-shot bracketed HDR, panoramic HDR and more! (more info).
What is a “Stop” of Light?
The concept of a “stop” of light is probably the most important concepts in photography, yet it’s widely misunderstood. In this article, we want to take you back to the basics to help visualize a stop of light and changes in exposure.
A stop of light is not a quantifiable unit of light entering the camera but rather a relative one. Therefore, increasing by one stop doubles the amount of light let into the camera while decreasing by one stop cuts the amount of light in half.
There are three main categories for camera settings that you can adjust to produce the exposure you want: aperture, shutter speed, and film speed (ISO). Now that you know how a change in a stop of light will affect your image, you can decide which camera setting to change to achieve the right exposure. Although similar changes in one of these categories may give you the same exposure, the image will have a different effect in either the depth-of-field, the film grain quality, or the ability your camera has to freeze the scene in front of you. Any DSLR should also have a light meter to check overall exposure levels and you can adjust them accordingly.
1. Aperture
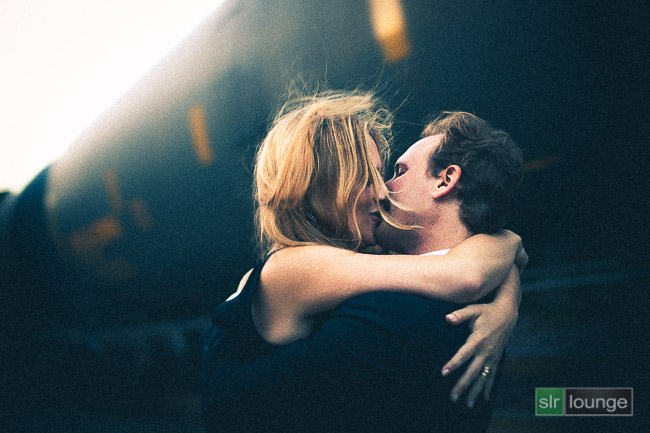
The aperture is the diaphragm opening within the lens of your DSLR. The aperture setting regulates the size of that opening and ultimately how much light is let in to expose the “digital film” of the camera which is the sensor. The larger the opening, the more light is exposed on the sensor in a specified amount of time. If you keep the shutter speed and ISO on the same setting while you increase the opening of the aperture, your image will have a higher exposure. By adjusting the aperture, keep in mind that your captured image will also have a shorter depth-of field. This effect is equally as important to the image quality as exposure. Depending on the type of scene, perhaps a shallow depth-of-field may be what you want. Close-up portraits are most often shot with a shallow depth-of-field to keep the focus on the subject while the background is unfocused as you can see in the image below.
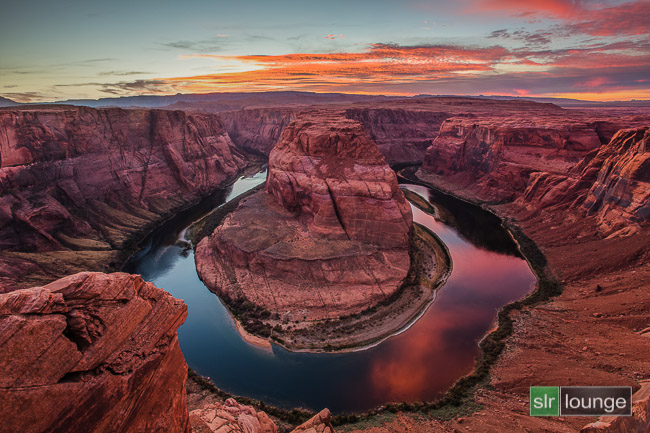
However, for landcape images you are more likely to need a broad depth-of-field to preserve detail in every part of the landscape-type scene you capture.
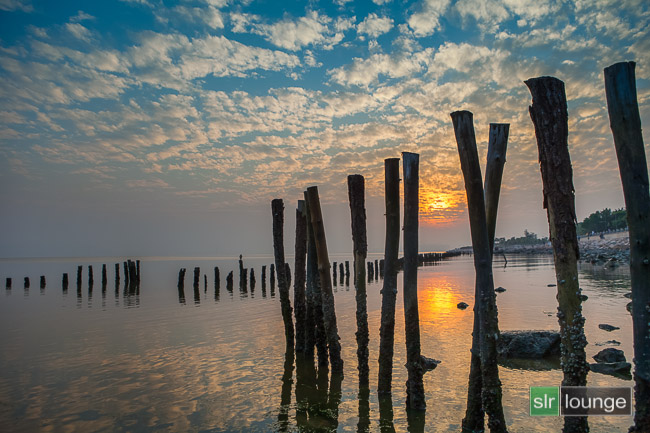
In this case, to produce a brighter exposure I would suggest adjusting your shutter speed.
2. Shutter Speed
Shutter speed is simply the amount of time that the camera shutter is left open. A fast shutter speed will freeze motion much better than a slow shutter speed. Here is an image where the shutter speed is set at 1/500 to freeze the motion of bubbles:

However, if you want the look of your image to actually show motion, use a slow shutter speed as long as you can adjust the ISO or aperture in the opposite direction to compensate for exposure. The scene below has a “drag-shutter” effect to show the movement of car lights in the city at night:

3. Film Speed (ISO)
The ISO is basically the sensitivity of your camera’s sensor. The higher the ISO setting, the more sensitive and the more grainy your image will be. Images shot with a low ISO are crisp and have a clean look, while high ISO images show film grain and can have more of a cinematic effect.
Conclusion
This basic information for exposure adjustment will help you achieve the look you are going after no matter what scene is in front of you. Go ahead and play with the different settings to experiment with each type of image. As long as you keep these suggestions in mind when you go out with your camera, you will have the ability to go out and create professional looking photographs.


Whilst I am supposed to know all of this after a few years of taking photos, it is well worth a read to re-emphasize what I know and what I thought I knew.
Well written, concise, to the point and well demonstrated by the accompanying photos.
ISO has nothing to do with exposure and it certainly does not increase the sensor’s sensitivity.
The exposure can only be determined by the aperture and shutter speed. These two settings alone control the number of photons that reach the sensor.
Increasing ISO can not increase how much light reaches the sensor.
The sensor has one sensitivity for measuring photon counts. This is the camera’s base ISO.
Increasing ISO does increase the signal gain after the signal leaves the sensor and the result is larger numerical values for each pixel are written in the raw data file (even if you only use in-camera jpegs). This means if you increase ISO by one stop in order to reduce the shutter speed by one stop, the exposure is reduced as well. Now there is less signal, but the noise stays the same resulting in a lower signal-to-noise ratio. This is the reason increasing ISO results in noisier shadow regions. It is also the reason increasing ISO reduces dynamic range.
The benefit of increasing ISO is the photographer enjoys more flexibility in shutter and aperture selections. Or, for those photographers who prefer algorithms make ISO decisions for them, the camera automation has more latitude to estimate what the best the shutter speed and aperture might be.
Good advice!
4th method= ND filters