I had an aging MacBook Pro. It’s a 2011 model, which I believe is the first model with Thunderbolt. And while the Thunderbolt connectivity has been great, the internal 5400RPM hard drive has gotten slower and slower over the years.
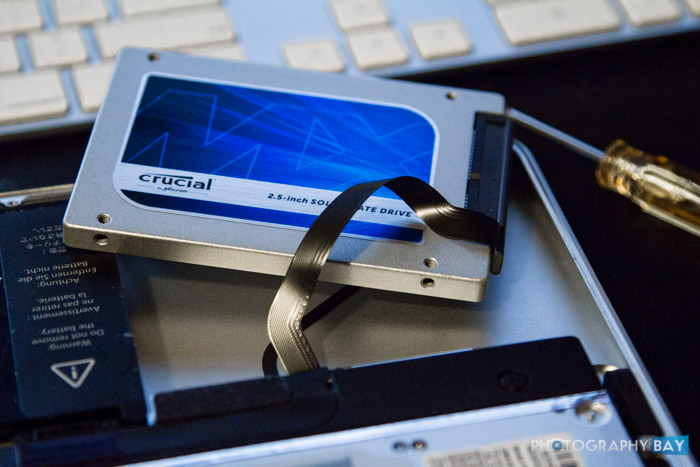
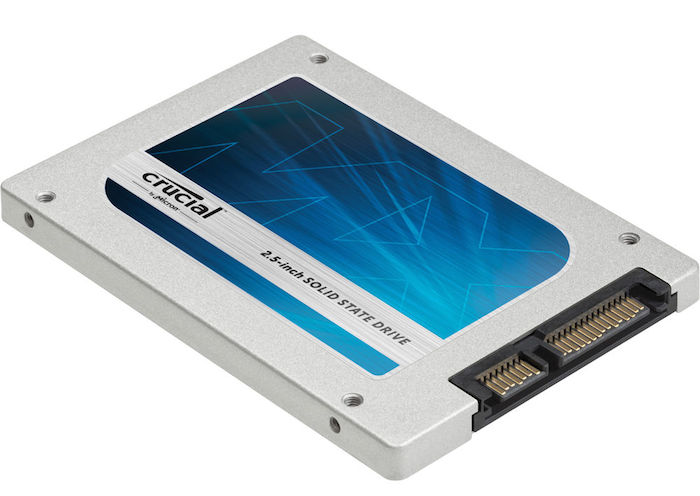
After hearing plenty of reports on the benefits of upgrading to an internal SSD drive in these MacBook models, I finally bit the (surprising affordable) bullet and picked up a Crucial 512GB SSD for a little over $200.
In preparation for the upgrade, I cleaned up the internal drive by deleting a ton of files that had bloated the storage usage over the past three years. I used a very handy (and free) program called Free Disk Space, which you can find here in the App Store.
I had roughly 20GB of free space when I started the purge. I ended up with over 300GB free space when I finished deleting all the extraneous Lightroom backups, Premiere preview files and other non-essential crap. This program is worth a few minutes of your time regardless if you are switching hard drives or not.
Of course, even after the purge, performance of the spinning internal drive was still crappy.
I then performed a current backup of my system drive using Time Machine.
When the new drive arrived from B&H, I popped open the MacBook and made the switch in 10 minutes or so. If you are performing the same upgrade and don’t have a torx screwdriver in your kit to remove the side screws from the internal MacBook HD, check out this little kit for $6 from OWC.
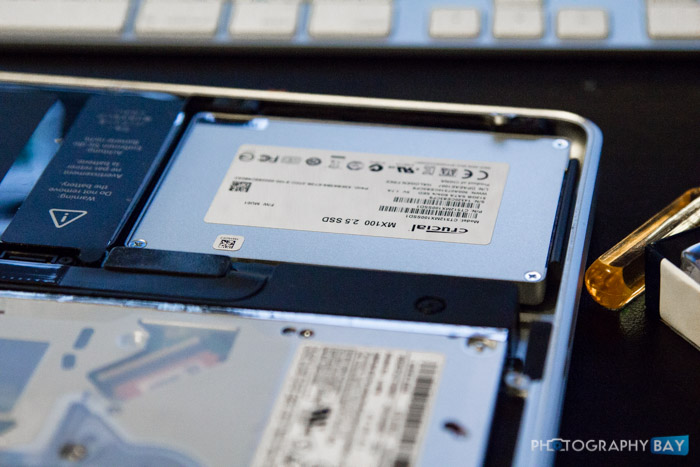
After reassembling everything, I connected my external drive with the Time Machine backup and booted up. Apple’s recovery program launched and I used Disk Utility to format the new internal SSD to Mac OS X Journaled. Then, I was able to restore from my Time Machine backup on the external drive to the new internal SSD.
The restoration took about an hour.
On the first boot up, I noticed a blazing fast time compared to what I had grown accustomed to. Check out the video below for a demonstration of just how fast the SSD system drive boots compared to the older spinning hard drive.
The actual benchmark speeds, however, might be even more impressive.
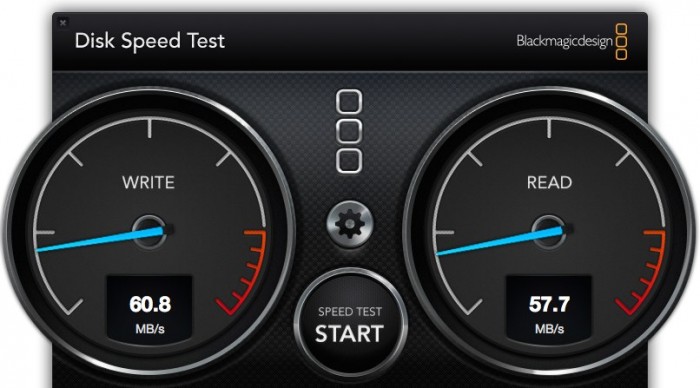
Disk Speed Test – Hard Drive
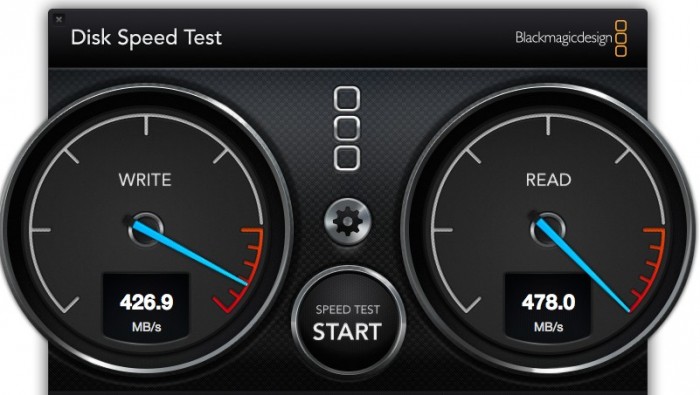
Disk Speed Test – Crucial SSD
Having a 25 second boot time is great. Programs open in a snap instead of watching the dock icons bounces for a minute or so.
Switching to a solid state drive actually made this 2011 15″ MacBook Pro a better performing machine than the day I took it out of the box. Now, I’m looking forward to getting a few more good years of use out of this machine.
You can find the Crucial SSD that I used here at B&H Photo.


This is great. I think I’ll do this on the old family MBP. Thanks!
Look into TRIM ENABLER if you want to keep the drive lasting a long time. Apple doesn’t automatically enable TRIM support on 3rd party upgrade drives. This app/add-on does the command line terminal function in an easy click and also checks on startup if you’ve recently upgraded or updated since TRIM needs to be re-enabled after each update. There’s a bit of debate, but the way SSDs handle trash, TRIM support makes a difference.
CarbonCopyCloner is also recommended. Make a bootable clone of your system drive and keep updated semi-frequently. Even if using time machine, this makes a difference. You can pickup a USB housing for your old drive for under $10 and just plug it in an let CCC update the clone each time.
Hey Brian,
That’s interesting info that I wasn’t aware of. However, I want to add the following link to this conversation, which changes TRIM support on OS X Yosemite and future versions.
Check it out here: http://blog.macsales.com/27116-disable-trim-before-upgrading-to-yosemite