The Huawei Mate 9 is an Android phablet that features a 20MP black and white, along with a 12MP dual-lens camera. Huawei sent me the Mate 9 to try out and I’ve been using it as a second phone for a couple months now.
My daily phone is my aging iPhone 6, which I’m tied to because of the Apple eco-system and not necessarily the camera. I’m trying to hold onto the iPhone 6 until whatever Apple releases later this year. The battery life sucks. The phone is pretty laggy and generally lackluster compared to my wife’s iPhone 7.
From a general phone perspective, the Mate 9 is a blazing fast upgrade for me. It’s been quite a while since I’ve used an Android phone on a daily basis and I have to say that I’m blown away by the overall performance of the Mate 9. The battery lasts all day and then some. If you need a quick charge, it only takes 20 minutes of charging time to get you to a battery level that lets you use the phone for the rest of the day.
The 5.9″ display offers a 1080p resolution with 373ppi. The resolution and brightness looks great on the large display and it handles itself just fine in daylight.
The fingerprint ID on the back of the phone allows you to gently swipe your finger left or right to navigate the photos when viewing them in the gallery. It’s a little thing but still a nice touch instead of swiping on the screen.
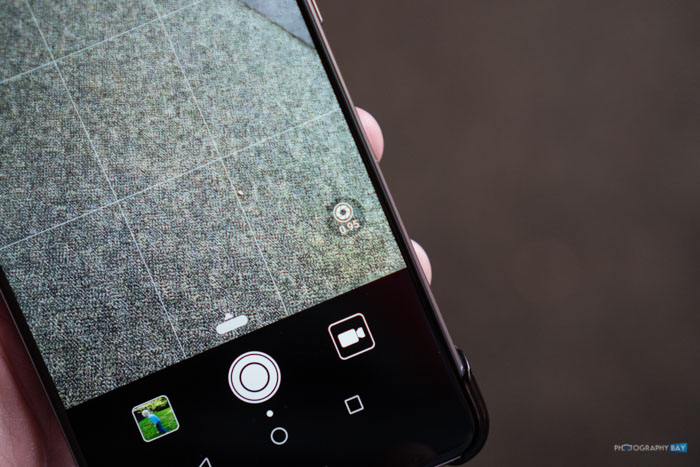
For the photo enthusiast, the Mate 9 offers a ton of control from manual mode to a synthesized depth of field effect powered by Leica’s software and lenses. You get to the aperture adjustment feature by tapping the little aperture icon at the top of the screen.
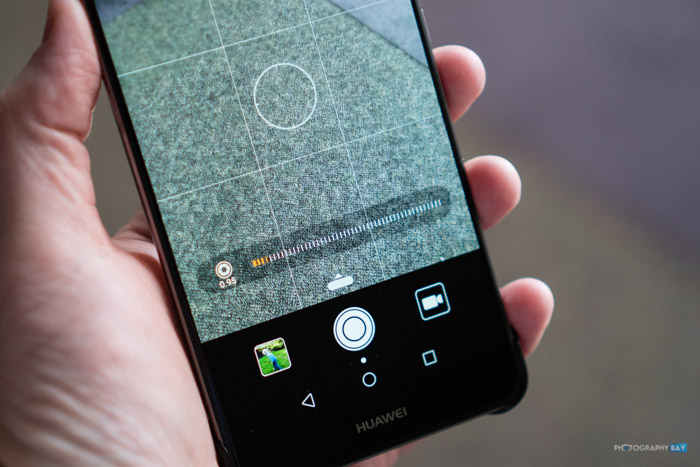
You can simulate an aperture range from f/0.95 to f/16. It works very much in the same manner as the portrait mode for the dual lens iPhone 7 Plus, but the f/0.95 simulation allows you to blur the background even more when using the Mate 9.

The simulated DOF looks great a lot of the time; however, just like on the iPhone, it misses the subject sometimes.

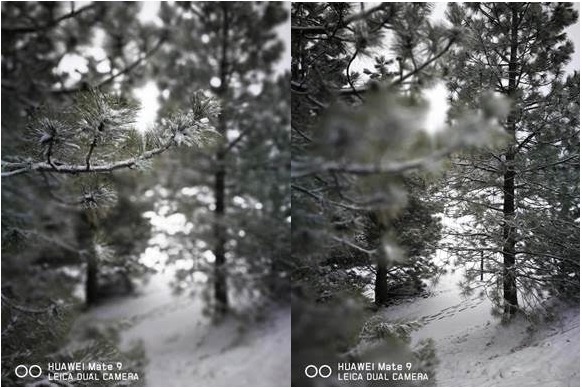
UPDATED: After I published this review, my contact at Huawei let me know that the focus area can actually be changed in post when you shoot with the simulated depth of field. That makes complete sense when you think about it. This is, after all, a simulated aperture effect. Check out the image he sent me below.
I tested it out on the above photo of my wife and can confirm that it works as advertised. Sorry I missed that one in the first run-through. That makes this feature even more useful.
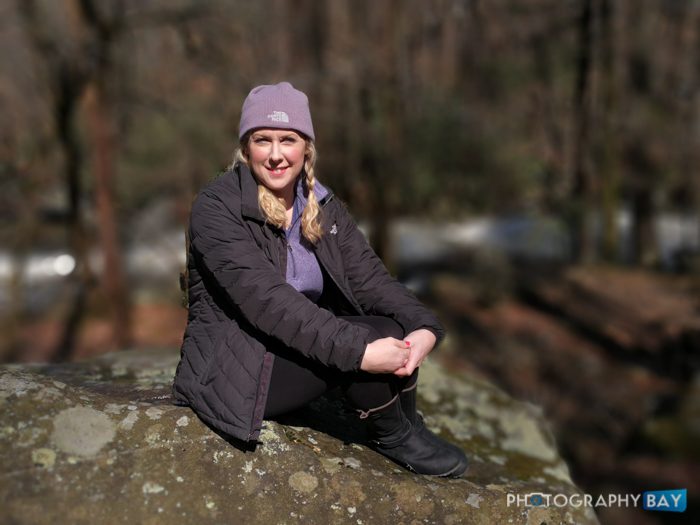
UPDATED: Same shot as above with post-corrected aperture effect.
You can also end up with some irregularities around the egdes from time to time. This seems to be most common in backlit situations. It’s not a huge deal, but it’s there and something the pixel peeper is going to notice.
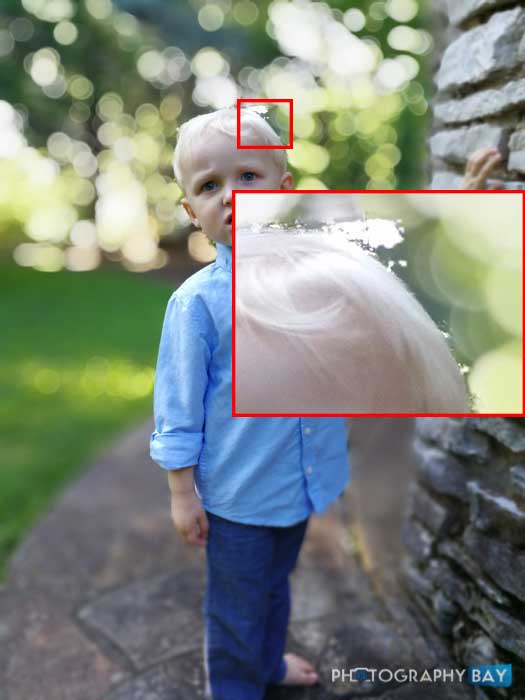
All in all, it’s a feature that I love and found myself using frequently. It is actually probably the most used feature on the Mate 9 for me.

By swiping the little tab up at the bottom of the camera app window, you get access to the Pro mode of the Mate 9’s camera, which allows you to adjust:
- Metering mode
- ISO value
- Shutter speed
- Exposure compensation
- Focusing mode
- White balance
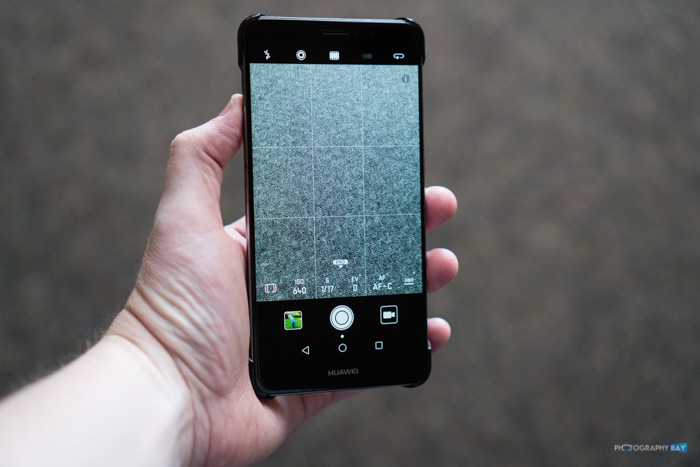
Tapping of the values for these different settings brings up a slider that further allows you to slide or tap to make the adjustments. It’s an intuitive operation that I know most photographers have to wish their phones offered. Sure, you can download camera apps for Apple and Android devices that get you lots of these features, but I always fall back into using the native camera app because it is the most accessible one.
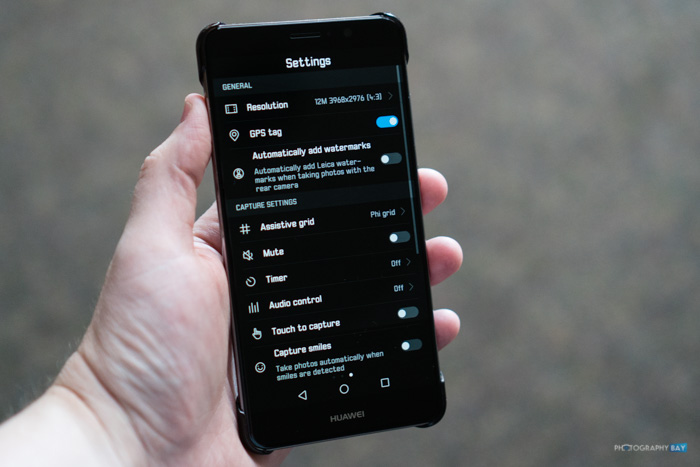
Swiping left on the camera app screen pulls up additional camera setting options, including the ability to change resolution or add GPS tags or watermark with a Leica and Huawei Mate 9 watermark in the lower left corner of the image.

The above photo was shot in near complete darkness with the Mate 9. The only light in the room is from my wife’s phone as she lying down while our son was drifting off to sleep. While the image is grainy, the black and white camera, along with the manual control, allowed me to capture the moment handheld at ISO 3200, f/2.2 for a 2s exposure. This would not have been possible with my iPhone’s native app.
The watermark is a little cheesy with the Huawei branding in there too. Huawei is all about the Leica camera inside the Mate 9. It’s marketed heavily and that’s probably the main reason they sent me the phone to review as a photography blogger. I think a simple Leica logo on the iconic red dot would have been a bit more appealing to photographers’ vanity and, frankly, I’d probaby have that on more photos myself if that was an option.
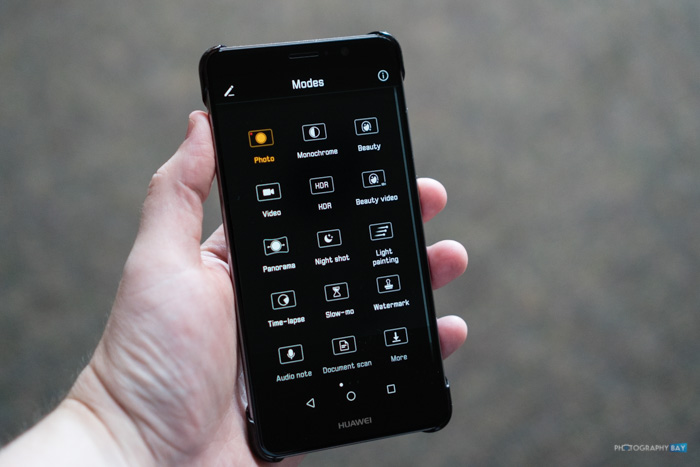
Swiping right lets you use a variety of creative presets and filters. You get a ton of features that we are becoming accustomed to seeing on flagship smartphones, including a skin smoothing Beauty mode, HDR, panorama, and plenty more. The “Watermark” filter on this page is different from what you see in the Leica/Huawei branded one from the other menu. These are very much like the Snapchat filters that give live info for your images like weather, time, day of week and location, among other phrases. It’s a nice built-in filter that plays upon what’s popular in current social photo apps.
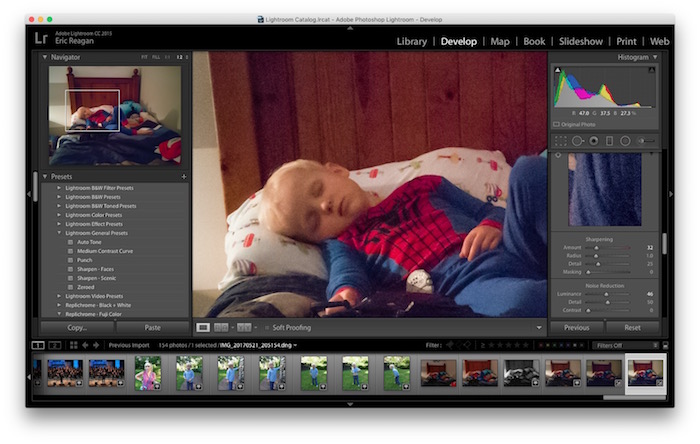
The Mate 9 allows you to capture DNG files, which you can easily import into Lightroom or your other favorite RAW editor. For the DNG files that I capture, I have full control of the RAW developing process, just like with a Leica digital camera. Of course, we are still dealing with the limiations of such a small image sensor that is built for a phone.
Final Thoughts

If you are Android user, the Mate 9 offers a lot the photographer to consider in your next upgrade. For iPhone users, I don’t know that there is enough purely photographic qualities to entice you to switch ecosystems unless, of course, you are tired of iOS. The Mate 9 is a solid performer and does a great job of extending a quality camera into a phone. In a shrinking camera market, it’s great to see smartphones with serious attention given to the camera within.
The Huawei Mate 9 runs $599 unlocked. Check it out here at B&H Photo.


Hello!
I wounder if you could share some of the raw dns files?
Thanks