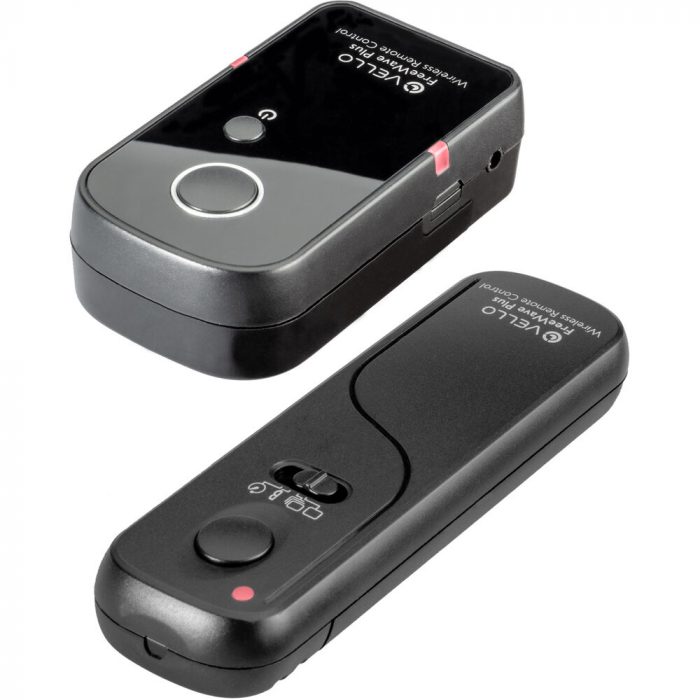
The Vello FreeWave Plus II is a wireless shutter release that can trigger the shutter from up to 320′ (~97m) away. The FreeWave Plus works with most cameras that have a remote port, including Canon mirrorless and DSLRs, Nikon, Sony, Olympus, Fuji, and Panasonic, among others. I’m using the Canon version, which ships with both a Canon 3-pin cable, as well as a 2.5mm sub-mini cable.
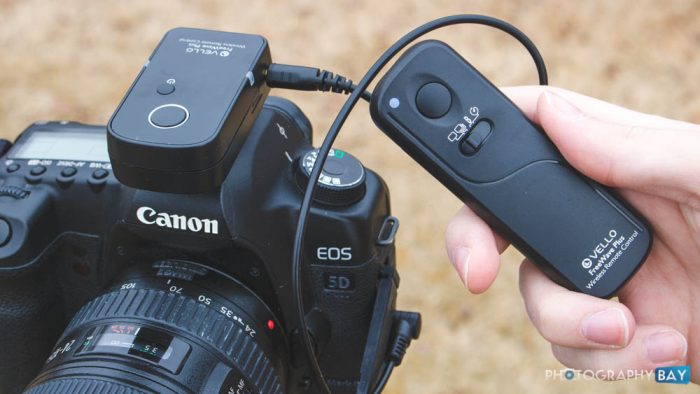
I’ve always carried the old Canon RC1 wireless remote in my camera bag; however, it occasionally has a limitation for me in everyday use due to the limited range of around 20 feet, thanks to the optical infrared triggering. I’ve also found issues when using the RC1 to trigger group photos that I’m in where there is a bright light source behind the camera (e.g., the sun). Additionally, the Canon RC1 requires line-of-sight to trigger the camera’s shutter, which is not required for the Vello FreeWave Plus.
The Vello FreeWave Plus uses a 2.4 GHz radio system with 16 available channels to avoid interference. The 2.4 GHz frequency is what we find in older WiFi. It’s a longer wavelength than the modern 5 GHz frequency. As a result, the signal travels further and maintains integrity through solid objects. The downside of the 2.4 GHz frequency is that it is ubiquitous among wireless devices like older routers, microwaves, Bluetooth devices, baby monitors, garage door openers, and more. Again, the 16 available channels allow you to set aside a channel within the trigger’s range to avoid other interfering devices. In practice though, I haven’t experienced any interference with the Vello FreeWave Plus.
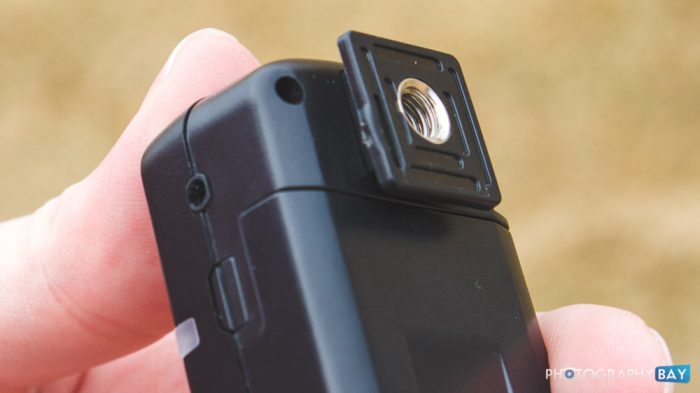
The FreeWave Plus receiver attaches to the camera’s hot shoe. It also has a 1/4-20 socket on the bottom if you don’t have a hot shoe available. The receiver then plugs into the camera’s remote port. You power on the receiver by holding the power button for 2 seconds. The same process is used to turn it off. The LED indicator lights will light up for a second during power on and flash four times quickly when powered off. While on, the LED lights blink red every 2 seconds to indicate the power is on.
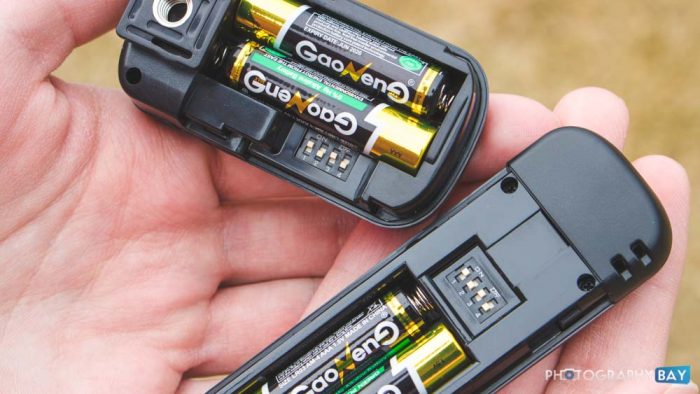
Both the receiver and transmitter are powered by a pair of AAA batteries, which are included with the remote (yay!). The channel is selected via four dip switches that are found in the battery compartment of the transmitter and receiver. Just match the dip switch configuration on both devices and you’ll be on the same channel.
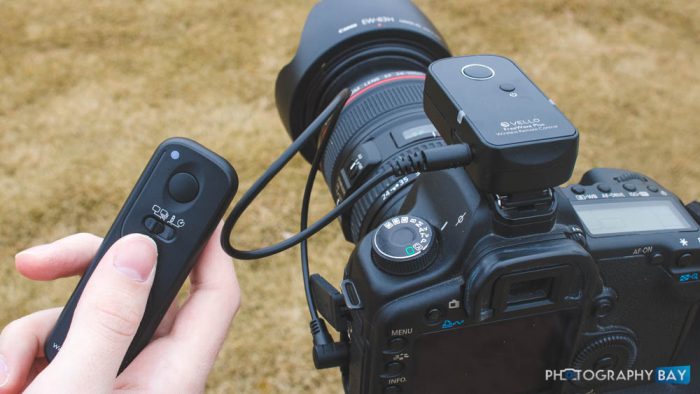
The transmitter gives you four shooting modes: single-shot mode, continuous mode, bulb mode, and self-timer mode.
In single-shot mode, press the shutter button on the transmitter halfway to focus the camera. There is a noticeable stop halfway on the shutter button – just like on the camera’s shutter button. The LED on the transmitter lights up blue. Press the shutter the rest of the way to take the photo and the LED will flash red.
In continuous mode, it works just the same as single shot mode except holding the shutter button down on the transmitter triggers the camera to take photos at 1-second intervals until you release the shutter button on the transmitter. It will behave this way even when the camera is in single-shot mode. To use your camera’s highest-speed burst mode, you need to set the shooting mode on your camera to continuous shooting and set the FreeWave Plus to B (bulb) mode. Press the transmitter’s shutter button once to begin the high-speed burst shooting. Then, press it again to stop the burst.
In bulb mode, set the camera to bulb mode as well as the transmitter. Press the transmitter’s shutter button to begin the exposure. The shutter will remain open until you press the transmitter’s shutter button again.
In self-timer mode, the camera should be in single-shot mode. When you press the transmitter’s shutter button, it will trigger the shutter after a four-second delay.
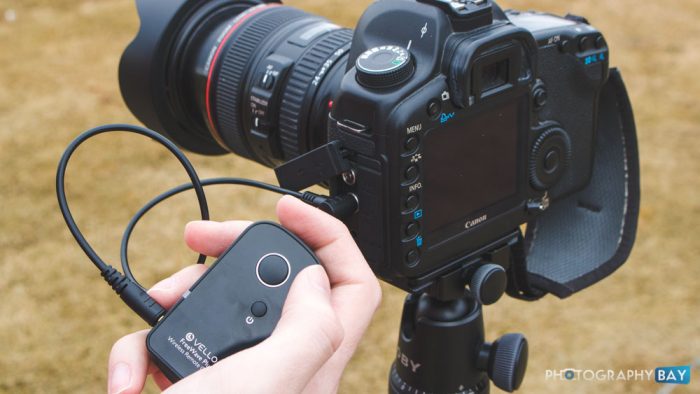
Finally, if you don’t have a wired remote in your bag and you want to trigger the camera’s shutter without any vibration input from your hand, you can remove the receiver from the hot shoe and use the button on the receiver with the short remote wire attached to trigger the camera’s shutter. If you’re doing a lot of this kind of shooting or need more advanced features like an intervalometer, I do recommend the more feature-rich Vello ShutterBoss remote timer, which is designed for this kind of interaction.
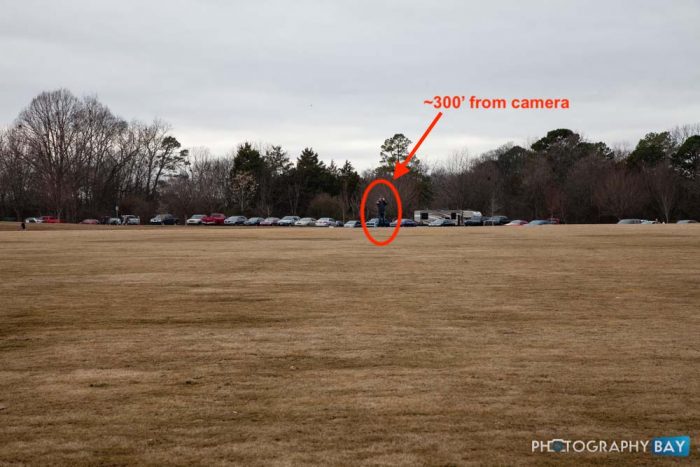
At short distances of 50 feet or so, I’ve had zero issues with the FreeWave Plus triggering through multiple walls and outside line-of-sight. While the remote is rated to trigger up to 320 feet, when I specifically tested the distance in an open field, the trigger became less reliable beyond 250 feet. Of course, 250 feet is still pretty solid for reliable performance and is beyond what I really ever need for triggering a remote camera. There are higher-end solutions for long-distance remote triggers but the FreeWave Plus is a solid option for the $60 asking price that can always be in your kit. Highly recommended.
The Vello FreeWave Plus II is available from Photography Bay’s trusted retail partner, B&H Photo, at the following link:
By making your photography purchases at B&H Photo through these links, you are helping Photography Bay continue to bring quality camera tests, news, and reviews. Thanks for your continued support.
Disclosure: B&H Photo provided a product sample of the Vello FreeWave Plus II for the purposes of this review. This never changes the opinions of the products I review – good or bad.
