 Last weekend, my wife asked me if I wanted to shoot her brother’s yearbook pictures. I said, “Sure,” without really knowing what to expect. She told me they would be less formal than a traditional high school’s yearbook photos because, in his home school group, it’s up to the parents to get the photos done and to the yearbook editors. “Something nice in the backyard,” she said. Upon my arrival, however, the in-laws wanted a more traditional/formal shot for the yearbook.
Softboxes for $0.16
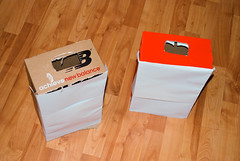
I don’t really have a great portrait setup, so my next question was, “Do you have a couple of shoeboxes?” When I found out we had shoeboxes to work with, I began rounding up the rest of the supplies and tools. The full list:
- 2 shoeboxes
- 4 sheets of printer paper
- scotch tape
- pocket knife
- pen (for tracing)
Assembly Instructions
As you can see from the above photo, there’s nothing really sexy about this design. But for those who need the step-by-step, here you go:
- cut top off of shoebox
- trace flash head on end of box
- cut out traced rectangle
- tape 2 sheets of paper on open part of box
- insert flashes (in my case a Nikon SB-24 and SB-26)

Shooting With the Shoeboxes Softboxes
I asked Adam’s mom and dad to be my light stands as I positioned him on a flat wall in the spare bedroom. I’ve never really done formal portraits; however, we were all pleased with the results from my shoebox/softboxes. I ended up having each box about 2.5-3′ away at roughly a 45 degree angle to the front. I shot at ISO 400 to get keep the shutter speed up and flash recycle times down (1/2 power on my Nikon speedlights). Shutter was 1/160 and a safe aperture of f/8. Minor RAW processing in Lightroom.
If you’re interested in the gear I used:
Closing Comments
While I’m on the DIY topic, let me direct your attention to a solid list of DIY photography resources over at Hi-DOF Photography. I ran across it today when I saw some inbound hits to Photography Bay’s DIY Ringflash. It’s a great resource worth bookmarking.
I’m interested in your thoughts. What do you think about this DIY project? What could I have done better with the softboxes or the shoot?


Very smart!
I think it may be better to put the cutout on the longer side of the box. that way it’s evenly weighed on the flash. Sometimes it makes the flash fall when it’s vertical due to so much weight. you can’t really tilt it much.