In this video from Jay P. Morgan at The Slanted Lens, we learn how to make a great 4′ x 4′ reflector with a silver and a white side using an $8 sheet of foam insulation sheathing.
[via ISO1200]
Digital Camera News, Reviews and Tips
By Eric Reagan
In this video from Jay P. Morgan at The Slanted Lens, we learn how to make a great 4′ x 4′ reflector with a silver and a white side using an $8 sheet of foam insulation sheathing.
[via ISO1200]
By Eric Reagan
Phlearn is back with a great lighting tutorial using a cheap DIY light setup that costs less than $50. More importantly, Aaron Nace breaks down how to use the lights to get a certain look. He goes further to show his camera’s settings for the shots and how to work with your subject to get the best possible portrait with this setup.
The lights he mentions in the above video can be found currently for $15.99 each here on Amazon.com.
By Eric Reagan
The problem with mounting a GoPro to a DJI Phantom or other drone is that the vibration of the propellers creates a terrible jello effect in the footage. This is the main reason that gimbals have become such a popular accessory for drones. But gimbals are expensive.
Two grad students from USC were searching for a cheaper way to reduce the jello effect in their footage from their Phantom-mounted GoPro. After months of failure in testing several aftermarket products, they finally built their own mount with household items for less than $10.
They discovered that they had to dampen the attachment between the GoPro and the Phantom, which is something that none of the attachments on the market allowed. In the end, they used a pair of sponges and some semi-rigid wires to connect a mount that was constructed from a plastic lid.
The results are impressive and resemble the look of an expensive gimbal when viewing the output footage. You can see a full walkthrough, along with sample footage, in the video above.

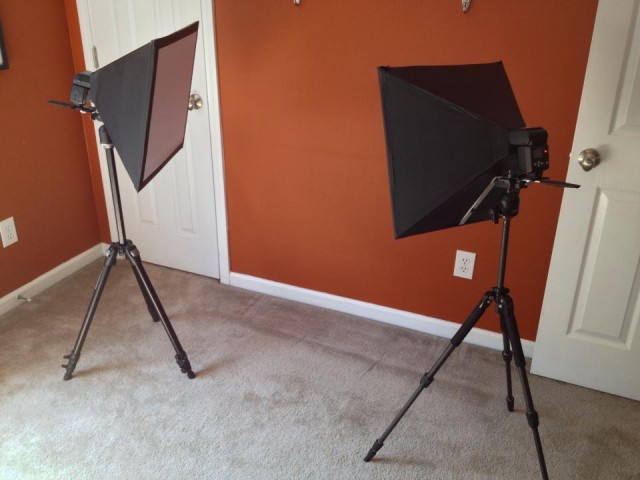
I recently decided that I wanted to take my food photography up to another level, and in order to really make that work, I needed some soft boxes to better diffuse light.
The problem was that all of the available soft boxes I could find cost upwards of $100 apiece (and I would certainly need at least two soft boxes to make my setup work). Since this was just a project for sharing amongst my friends, rather than for paying work, I couldn’t justify the expense. [Read more…]
By Devon Hicks

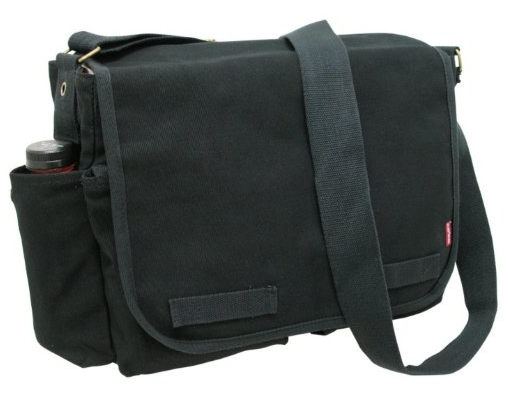
My Vivitar camera backpack has way outlived its shelf life, with ripped dividers and nowhere near enough protection for my gear, and it was time for a replacement. Initial research showed that nearly any of the name brand offerings were out of reach, ranging from $130 for the Think Tank Retrospective Bags, to $300-400 for their rolling cases. While these products are worth every penny typically, my lean budget wasn’t going to accomodate it.
A Cheesycam article perked my interest in creating my own solution out of a padded divider from Calumet, along with a cheap rolling suitcase from a big box store, but those dividers are currently backordered. With the possibility of this sort of solution in mind, I set out to find something similar. [Read more…]
By Eric Reagan

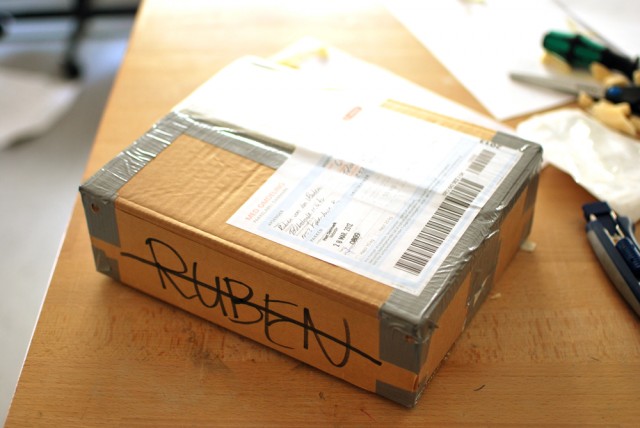
Have you ever wondered the path that a pack takes after you mail it? All the vehicles on which it travels and hands that touch it?
Ruben van der Vleuten, Industrial and Interaction designer, put a hidden camera in a package to capture its journey, which you can see the below video. [Read more…]
By Eric Reagan
Looking for a way to mount a lightweight camera on your bike for some creative videos or stop motion? Check out the super-cheap DIY guide below. [Read more…]
By Eric Reagan
Check out this $56 Coleman LED lantern kit, which breaks down into 4 separate LED lights with rechargeable batteries.
Of course, Coleman designed this as a camping accessory; however, it looks like it could work well as a compact remote light setup for video. Obviously, it’s not for everyone, but if you are looking for a DIY light kit for your budget videos, this might fit the bill.
Check out the video below where the guys from Cameratown give it a go. [Read more…]
By Eric Reagan
This is a pretty intense video that documents the disassembly and resurrection of a cheap Canon EF-S 18-55mm lens into a SuperMacro version of the same lens. It’s not for the faint of heart.
[via PetaPixel]
By Eric Reagan
I just wanted to pass along a little update for those of you into video cameras and accessories. Over at Tech Tilt, I’ve recently review the Barber Tech SteddiePod, which is a pretty darn sweet, all-in-one video camera stabilization device. It does a lot of things from steadicam-type shots, to doggie cam, to boom shots. It’s also got a nice little fluid head built-in. You can find the whole review, which includes some sample footage, here: SteddiePod Review.
After using the SteddiePod for a while, I started thinking about ways to DIY a similar device on a shoestring budget. So, I took $30 to Lowe’s and Wal-Mart, and came away with what I call a DIY GlidePod. While it’s not as pretty as the SteddiePod, it can do many of the same types of shots. Of course, the SteddiePod is a smoother, more refined device, but the DIY GlidePod can get the job done for the backyard cinematographers out there. So, if you’ve got $30 and an hour to kill, you can see how to make your own DIY GlidePod here.
I’ve had some great suggestions on ways to make the GlidePod better, along with alternatives that do a better job with some of the shot types from the GlidePod. If you’ve got other ideas, feel free to drop a comment here or over on the GlidePod post.
If you’re interested in video gear and accessories, you’ll be able to find camcorder reviews and such over at Tech Tilt in the future. However, I’ll also provide occasional updates on noteworthy gear here at Photography Bay.