I recently decided that I wanted to take my food photography up to another level, and in order to really make that work, I needed some soft boxes to better diffuse light.
The problem was that all of the available soft boxes I could find cost upwards of $100 apiece (and I would certainly need at least two soft boxes to make my setup work). Since this was just a project for sharing amongst my friends, rather than for paying work, I couldn’t justify the expense.
Then I got to looking at commercial soft boxes and asked myself, what are these really? Nothing more than a small white box with white fabric stretched over one end, right? And so I decided to simply build my own.
To duplicate (each of) my boxes, you’ll need the following:
- Two sheets of 20″ by 30″ foamboard
- A measuring stick
- Regular masking tape
- “Gaffer’s” tape
- A Razorblade or X-Acto knife
- A yard of cheap, textured satin fabric (white)
- Two 12″ by 1″ by 3/8ths” strips of aluminum (available at Home Depot)
- Three 1/4″ by 20 thread-count by 1″ tall flathead bolts, each with a matching nut
- A 1/4″ by 20 threadcount bolt, this time with a thumb-turning head
- A can of white spray paint (flat)
- A can of black spray paint (flat)
- A drill with a 1/4″ bit

Construction is quite simple. I used a Nikon SB-600 Speedlight as my template, but you can fit this to any size or type of head unit (using the Gaffer’s tape as described below).
Start by measuring the widest dimension of your flash head. The SB-600 is about 3 inches wide, so I measured about 18 inches from the edge of my foamboard and drew a 3-inch long line in the middle of the paper. Next, decide on the exterior dimensions of your soft boxes. I made one that was 20 inches wide and another than was 18 inches. I would recommend at least 20 inches in size. Being careful to use the same center point that you used for the 3-inch line, mark a 20-inch long line at the edge of your foamboard. Now draw two lines to connect the 20-inch line to the 3-inch line, forming a trapezoid.
Carefully cut out your template trapezoid with your razorblade. (Cut over an old table or cutting board!) Now, use your template to trace and cut out three more trapezoids, all the exact same size. When you’re done, you’ll have the four sides of your light box.
Taping these four pieces of foamboard together results in a box which will collapse. You need a “picture frame” for the front, to add rigidity. Assuming you chose to make a 20-inch wide softbox, simply trace out a square of the exact same size and cut it out. Now, measure one inch from the border of the square and carefully cut out a smaller box, inside your first square, and punch it out, making a “picture frame.”
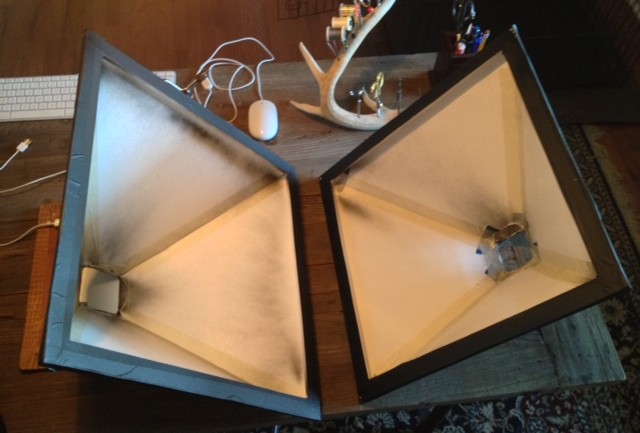
Now tape everything together with masking tape. This part is easy. When it is all taped up you’ll be surprised how rigid it is. Go ahead and take it outside and paint it, black on the outside; white on the inside. (Paint in two sessions at least four hours apart and be careful of overspray).
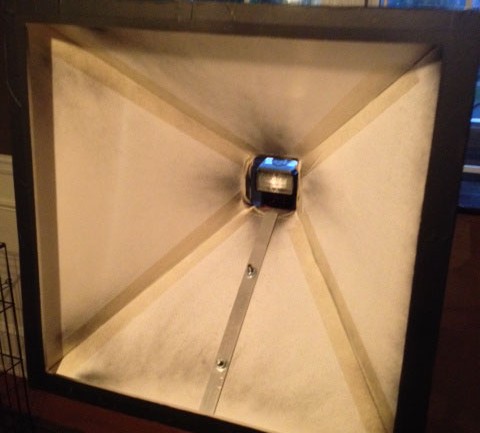
Next you’re going to assemble your mount. This part is easier than it looks. First, drill two holes in each of your two pieces of aluminum; one hole an inch from one edge and the other five inches from the same edge (for both strips of aluminum). You want these holes to line up, because you are going to place one of these strips of aluminum inside the box. The other strip goes on the outside. Use two of your 1/4″ bolts and run them through so that each strip of aluminum “sandwiches” the foamboard. In order to position this bracket, find the middle of one trapezoid and mark with a pencil, then punch the holes so that they line up with the inner and outer strips of aluminum. If the inner strip is too long, just cut it off with a hacksaw or tin snips; it will never be seen.
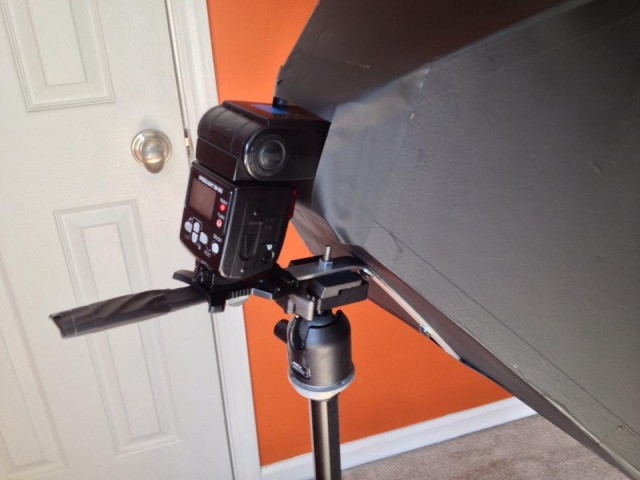
Your exterior strip should have a long end sticking out towards the rear of the softbox. Using the guess-and-check method, bend this end to a 45 degree angle (as shown in the pictures). This is the piece you will mount your Speedlight to. Once bent, position the light to determine where you will need to drill your next two holes.
One hole should be inside of the Speedlight mount and will accept your tripod head bracket (as shown). The other hole will accept the Speedlight shoe bracket (Nikon Speedlights conveniently come with a plastic shoe bracket with its own 1/4″ tripod screw hole). Bolt your tripod head plate on to the inner hole and mount your Speedlight to the outer hole, using the thumbscrew to hold the Speedlight via its plastic shoe bracket.
You may need to modify an existing tripod head plate with a longer screw in order to have room to screw the nut down; this modification should be easy and reversible. (I used the plate from a Manfrotto RC2 quick release head system). All tripod mount screws are 1/4 inch wide with a 20-threadcount, so just match accordingly (and save your original bolt so you can still break this down and use the tripod plate elsewhere).
Once your Speedlight is mounted, use the Gaffer’s tape (which is like heavy duty, easily-removable duct tape) to seal around the Speedlight head to create a light curtain. Don’t tape the Speedlight in completely – you will want it to be removable. This also allows you to custom fit your square hole to your rectangular Speedlight head.
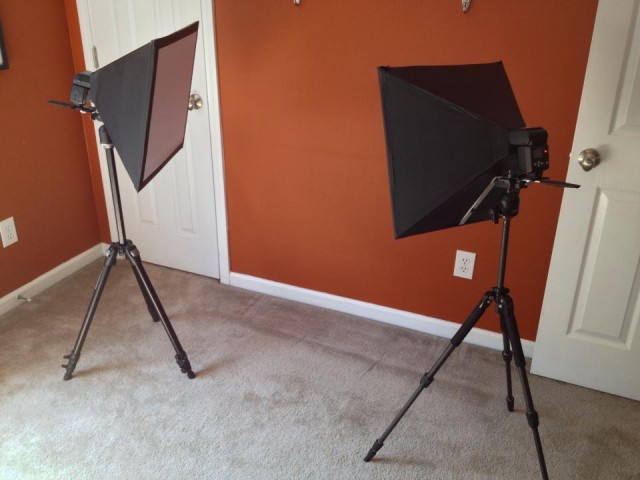
Finally, using more Gaffer’s tape, cut and fit your white fabric tightly over the front. That’s it! Your soft box is done. By my estimate this version should cost less than $20 as opposed to $100 and will serve you for years in a home studio (its major disadvantage over the commercial models is that it does not break down).
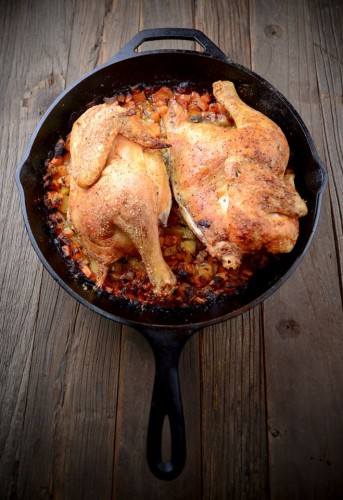
Using my new homemade soft boxes and a rough old table, I was able to get the food shots I was looking for. And, ironically, those shots soon turned into paying work instead of “Facebook” material.
About the author: Zach Matthews is the host of The Itinerant Angler, and is an outdoor writer and photographer. He is the Southeast Field Editor for Fly Fisherman magazine and has been a regular contributor since 2006 to a variety of outdoor publications, including American Angler, Fly Tyer and Backpacker, among others.


Two thumbs up! Of course it is not a big deal. Most people I guess just don’t think of doing things as everything is so easily available. Some might not have time. But just a bit of manual skills can save you lots of bucks. It also gives you satisfaction, if you would do a good job.
I lately produced a reflector holder out of… mop stick. It is not collapsible but instead of 100+ dollars I spent 5.