
If you’re an event, wedding or concert photographer you know the pains of shooting in low light all too well. Some of the main problems are focusing, white balance issues, high ISO noise, and ensuring that you capture the correct motion. All of this can be pretty tricky, especially if you’re trying to get a variety of angles to ensure that your shots don’t all look the same. Here are some tips for shooting and how to save your work in post process.
1. Shoot RAW
This should truthfully go without saying, but there are many added benefits of shooting RAW. It allows you a whole different scale of versatility in post processing vs shooting JPEG. This will further allow you to get the shot that you wanted instead of that one that came out of the camera.
2. Use a Fast Lens with Manual Override or Manually Focus
These two things combined together will really save you. If you let the lens auto-focus and then you touch it up a bit, you’ll ensure that your subject is sharp and rest of the image is blurry due to bokeh. Faster lenses are usually better because they allow for the most light to hit the sensor and are also great for faster shutter speeds to capture motion.
Otherwise, turn off your auto-focus.
3. Over/Underexpose Depending on the Shot You Want

I tend to underexpose my images to capture the motion and in post-process adjust the shadows and highlights. Photoshop is great for this, but Lightroom and even Photoshop Elements can really be all you need to get the image to where you want it. I refrain from saying a balance image because what you may want isn’t always balanced according to a histogram. In this shot, I wanted to capture his motion just a little bit as it makes for a more dramatic shot. So I slowed down the shutter speed just a tad.
4. Don’t Worry About White Balance…Yet
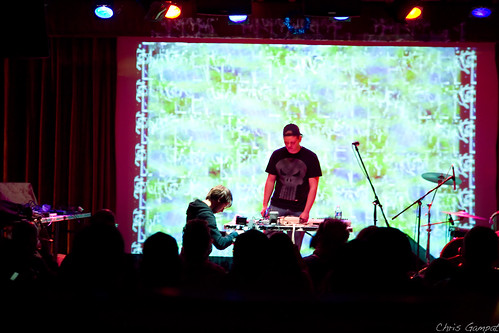
Your camera is bound to not capture the correct colors or the colors you want (which is what white balance is.) Leave this setting on auto and don’t mess with it too much, especially if you’re working under colored stage lights. It may annoy you that your colors are off, but try to figure out how you want it to look and then fix it in post-process.
The above image is closer to what the actual event looked like. However, the background colors are off because it is an on-screen display.
5. Crank Your ISO Up Modestly

While noisy images can be used to a certain point, you also need to find a balance between the capabilities of your fast lens and the ISO noise. This will help to capture faster motions (which tend to happen often). If you’re doing long exposure shots (which are great at concerts) then remember to lower your ISO down and crank it back up when you’re done.
In bad lighting, noise in the out of focus areas can look fine as in the shot above.
6. Convert to B/W or Use Crazy Color Processing
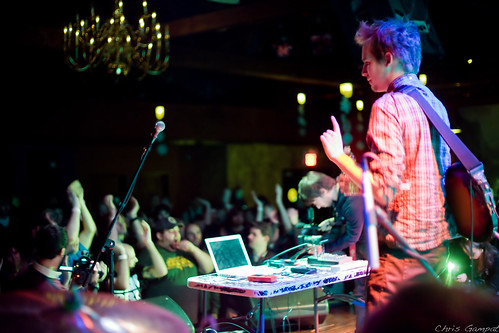
One of the great things about high ISO images is that they look great in black and white. But if you don’t want to do this then try warping the colors to make them look like something totally different but still very interesting. It will make your viewers stare at your shots longer.
I couldn’t get this shot to where I wanted it color wise but it’s close. The colors are wacky and crazy, but it’s an awesome shot nonetheless. Don’t let that get you down and throw out an awesome shot. You worked for it, use it.
7. Only Sharpen After You Noise Process

The reason for this is because of the problems that occur in noise processing. I’ve noticed that my images become a bit softer after noise processing. To get that level of detail back, it is essential that you sharpen a bit. Sharpening also tends to add noise but not too much unless you sharpen all the way.
What tips can you add for shooting in troubling lighting?


Great tips. Your example photos are in what all look like band/stage/theater lighting, which I think most viewers tend to accept will be strange anyway. My favorite technique for cleaning up more mundane color casts is a simple one in Photoshop using individual Levels channels.(http://thediscerningphotographer.com/2009/06/20/photoshop-tip/)
Andrew
TheDiscerningPhotographer
@Andrew – Thanks for the comment. That’s a great tip in the link you left and a smart post-processing technique.
When I started shooting concerts, I found Todd Owyoung’s website to be a great starting point. He has some really good articles and tips for concert photography. Definitely worth a look!
http://ishootshows.com/
Very informative and helpful tips. Keep it up and going please.
Great tips! Biggest pet peeve is photographers CRANKING the ISO (3200+)through the roof, when probably you could gotten away with 2000 or 16000.